Introduction: Why Use Samba for Time Machine Backups?
Many Apple users with home servers or NAS systems running on Linux often find that getting macOS devices to communicate seamlessly with these systems can be challenging. Samba provides an ideal solution, allowing Linux-based file servers to offer macOS-compatible shares, including Time Machine backup targets. In the past, this setup required complex configurations, including manually creating sparsebundles. Today, however, thanks to Samba’s new capabilities, we can create a Time Machine-compatible share that Apple devices can easily discover and use for backups with minimal manual intervention.
In this guide, we’ll set up a Samba server on Debian (though these steps apply to any modern Linux system running Samba) for Apple Time Machine backups and show how to leverage zeroconf to simplify network discovery. We’ll also cover some tweaks to optimize performance and ensure compatibility, so you can set up a reliable and effortless backup solution.

Prerequisites: What You’ll Need
- A Linux server (Debian-based preferred, but works with most modern Linux distributions).
- Samba installed on the server.
- A mounted storage drive (e.g.,
/media/Backup) with enough space to store backups. - macOS devices that need Time Machine backups.

Step-by-Step Setup: Configuring Samba for Time Machine
1. Install Samba and Prepare Your Backup Directory
If Samba isn’t already installed on your server, install it via:
sudo apt update
sudo apt install samba
Check if the Samba services are running properly:
sudo systemctl status smbd
sudo systemctl status nmbd
Next, create a dedicated directory for Time Machine backups on your mounted storage drive. In this example, we’ll create a TimeMachine folder inside /media/Backup:
sudo mkdir -p /media/Backup/TimeMachine
sudo chown -R  /media/Backup/TimeMachine
2. Configure Samba with Apple-Compatible Settings
The following configurations make Samba compatible with Apple devices, ensuring that Time Machine can recognize and write backups without issue. Open your Samba configuration file:
sudo nano /etc/samba/smb.confEssential Configuration Settings
In the [global] section, add these lines for macOS compatibility:
[global]
security = user
wide links = yes
unix extensions = no
vfs object = acl_xattr catia fruit streams_xattr
fruit:nfc_aces = no
fruit:aapl = yes
fruit:model = MacSamba
fruit:posix_rename = yes
fruit:metadata = stream
fruit:delete_empty_adfiles = yes
fruit:veto_appledouble = no
spotlight = yes
Explanation:
fruit:aapl = yesenables macOS compatibility for file attributes.fruit:time machine = yesspecifically flags this share as Time Machine-compatible.fruit:time machine max size = 250Glimits the backup size to 250GB per device. Adjust this as needed for your setup. You can also remove this configuration so that time machine can use the whole HDD, if more than enough free storage is available.fruit:model = MacSambahelps with compatibility by signaling to macOS that this share supports Time Machine.
Adding the Time Machine Share Configuration
At the end of your smb.conf file, add the following time machine share definition:
[TimeMachine]
path = /media/Backup/TimeMachine
available = yes
writable = yes
guest ok = no
valid users = (your-username)
vfs objects = catia fruit streams_xattr
fruit:time machine = yes
fruit:time machine max size = 250G
This setup allows Time Machine to recognize the share and store backups here. Samba’s support for fruit:time machine = yes eliminates the need for creating sparsebundles, as each macOS device will automatically create its own bundle within the share.
Make sure to set your username and adjust the path to your time machine backups.
3. Testing the Configuration
Before restarting the Samba service, it’s essential to test the configuration file to ensure there are no syntax errors. Use testparm, a Samba configuration testing tool:
sudo testparmIf testparm doesn’t report any errors, save the configuration and restart the Samba services:
sudo systemctl restart smbd nmbd
Leveraging Zeroconf for Easy Discovery
One of the benefits of Samba’s recent updates is its built-in support for zeroconf, which allows your Samba shares to appear automatically on macOS devices under the Network section in Finder. This means you don’t need to manually enter the server’s IP or hostname every time you want to access it.
Important Note on Avahi
Zeroconf functionality can conflict with Avahi, a service commonly used on Linux to manage network discovery. To avoid issues, make sure Avahi is not installed on your server, as it may override Samba’s zeroconf capabilities and prevent the Samba shares from appearing automatically on macOS.
But that depends on the system. On my older Debian 11 host I need avahi, so that the TimeMachine shares are displayed correctly in TimeMachine. But avahi leads to connection problems there when I want to connect to my shares in the Finder. That's only reliably possible with Cmd + K, because using the network area doesn't connect the share correctly all the time. So just try what works better for you. You can always easily install avahi again.
To remove Avahi if it’s installed, use:
sudo apt remove avahi-daemonWith Avahi removed, Samba’s zeroconf feature will allow the NAS server to appear directly under the Network section on macOS devices, making it easily accessible without manual intervention.

Accessing the Samba Share on macOS
With Samba and zeroconf set up, you can connect to the share in two ways:
-
Automatic Detection in Finder:
Open Finder, click on the Network section in the sidebar, and your NAS server should appear automatically, thanks to zeroconf. Select the server and connect using your credentials. -
Manually Connecting via Finder:
If you prefer or need to connect manually, pressCmd + Kto bring up the “Connect to Server” window. Entersmb://yourserver.localorsmb://<server-ip>(replace with your server’s hostname or IP address) and connect.
Once connected, you can access your shared directories, including the Time Machine folder, directly from Finder.

Setting Up Time Machine for Network Backups
On your macOS device, follow these steps to configure Time Machine:
- Open System Preferences: Go to System Preferences > Time Machine.
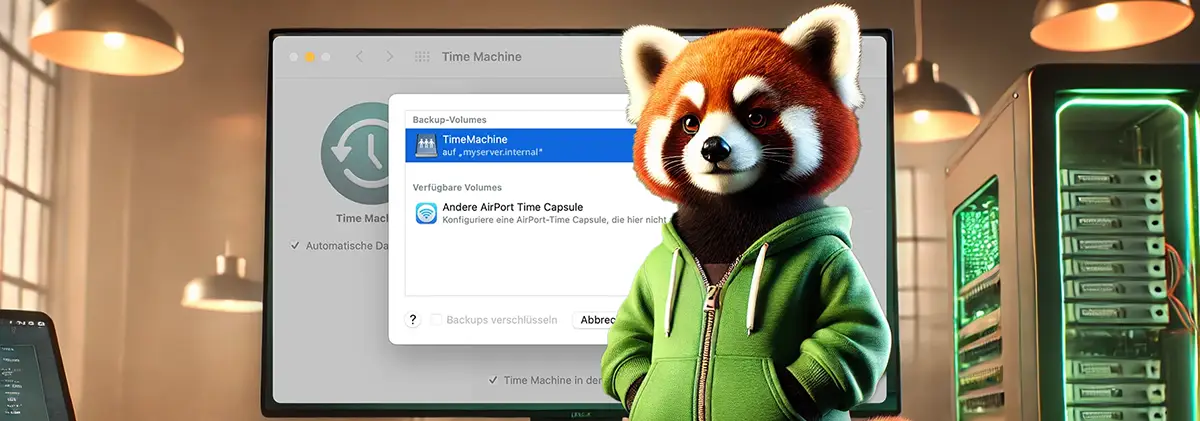
- Select Backup Volume: Click “Select Backup Volume” and choose your Samba share (the
TimeMachinefolder should appear as an option if configured correctly). - Authenticate and Start Backups: Authenticate with your server credentials, and Time Machine will start using the Samba share for backups.
Time Machine should now create and manage backups in the designated Samba share.
Troubleshooting Common Issues
1. Samba Share Not Showing in Finder
If the share doesn’t appear under Network, double-check that Avahi is not installed, as it may interfere with Samba’s zeroconf functionality. Restart the Samba service to ensure all settings are active. You can also try a different device. All declared shares should be visible there, including the time machine one.
2. Permission Errors
Ensure that the Samba configuration specifies valid users and that your server username has appropriate permissions on the backup directory.
3. Backup Size Limits
If you need to adjust the backup size limit, modify fruit:time machine max size in the share definition.
Conclusion: Streamlined Network Backups with Samba and Time Machine
Samba’s latest updates have simplified network backups for macOS users, making it a strong alternative for those wanting a reliable backup solution on a Linux-based server. By configuring Samba with the right settings, Apple users can now enjoy smooth and automatic backups over the network without needing to manually create complex structures. The zeroconf feature, coupled with Samba’s built-in Time Machine compatibility, makes managing backups more accessible and flexible.
If this guide has helped you streamline your backup setup, share your thoughts or reach out with questions—I’d love to hear your feedback and learn about your experiences!
This post was created with assistance from AI (GPT-4o). The illustrations were AI-generated and all screenshots were taken by myself. Curious how AI can help create content and images from your own ideas? Learn more at Neoground GmbH.


9 comments
Add a comment
10 Jan 2026, 15:29
EspenThank you for the excellent instruction. I did follow it for Rocky 9, adjusted with the comment from the others around the spelling error and the user name and that was it.
As usual, the most annoying is to get my Macs configured...
31 Dec 2025, 20:58
Joe TerrySven --
22 Dec 2025, 13:19
JimFantastic step-by-step, even for this noob.
As a former tech writer, I commend your work!
I had to research the "valid users" parameter so that both I and my wife can do backups from our Macs, but it was easy to find info.
Many thanks!
29 Sep 2025, 09:26
BasThank you for sharing this guide. One final step I needed to do is set a samba password for my users, so I executed:
sudo smbpasswd -a bas
20 Aug 2025, 22:31
maaThere seems to be a typo in the config:
fruit:nfc_aces = noshould befruit:nfs_aces = no14 Jul 2025, 20:00
sergeHallo Sven,
Vielen Dank für dein Beispiel, hat mir gut geholfen damit es mit Mac OS klapt.
Leider geht est nicht ganz bei mir (Time Machine Probleme): The selected network backup disk does not support the required capabilities.
11 Mar 2025, 16:25
HannesHallo Sven,
tolle Idee -- guter Ansatz -- doch im Detail verbesserungsbedürftig. Als Leitfaden für Einsteiger ist diese Anleitung sicherlich gut geeignet. Für einen "ultimativen Leitfaden" fehlen hier aber noch einige Punkte, z.B.
1) die Zeile:
01 Jan 2025, 13:44
Matthias DiehlHi Sven,
Danke für den Beitrag und liebe Grüße aus dem Hochtaunus (Neu_Anspach)
28 Dec 2024, 08:58
supertevranBin Deinem Leitfaden gefolgt und bis zum Punkt "Backup-Volume auswählen" hat auch alles funktioniert. Soweit erstmal vielen Dank! Leider kann ich aber keines auswählen .... Anmeldung am Samba-Server ist möglich und die Freigabe ist sichtbar. Klicke ich das kleine Pluszeichen heisst es: Keine Zielorte für Time Machine verfügbar. Der Samba Server läuft auf einem Proxmox LXC unter Debian 12. Der Client ist ein MacBook Air M1, 2020 mit Sequoia 15.2. Was könnte ich noch versuchen? Danke.
12 Jan 2026, 20:15
Raul RamosHard time to make this working on Debian 13 "trixie", I think is some is not write with fruit on the Dist.