Many are familiar with webcams installed at private or public weather stations, offering a view of the sky to assess local weather conditions, such as snowfall. Inspired by this, I aimed to implement a similar setup using my server, having previously managed a similar project in 2009 at a different location. This guide will show you how to set up a webcam on a Linux (Debian) system, automatically take photos every minute, archive them, and make them accessible for web integration (like on Weather Underground). Additionally, I'll discuss creating time-lapse videos using a simple script.
Firstly, connect your webcam via USB. Modern kernels usually recognize webcams plug-and-play. In my case, I used an older Logitech QuickCam Communicate STX. However, many current Logitech webcams are available at reasonable prices and offer good quality. They also allow you to adjust parameters, which can be quite useful. All commands are executed as root.
Check if the webcam is correctly recognized with lsusb. You should see a list of all connected USB devices, including something like:
[...]
Bus 001 Device 005: ID 046d:08ad Logitech, Inc. QuickCam Communicate STX
[...]
With the webcam connected, we can proceed to capture an image.
Taking a Photo with the Webcam
On our server, without a GUI, we'll use ffmpeg (the package name, though the command is now avconv) to capture an image from the video source. Install ffmpeg if not already present:
$ apt-get install ffmpegThen, capture a photo:
$ avconv -f video4linux2 -s 640x480 -r 1 -i /dev/video0 -vframes 1 -f image2 webcam.jpgHere, /dev/video0 should be your webcam. If you have multiple video inputs, you might need to try them out. The command uses the video4linux2 codec to take a VGA resolution photo and saves it as webcam.jpg in the current folder.
The result was a completely white image due to the webcam facing out the window and the excessive brightness outdoors. After some manual adjustments and experiments, I found a solution.
The Best Way to Dim the Webcam
The webcam images were too bright. A practical solution was using two dark sunglasses lenses in front of the webcam, held by a third hand from electronic accessories. This setup provided a reasonably good image quality, although it's not perfect in direct sunlight where most budget webcams struggle.
Providing the Webcam on the Web
To access the webcam from any PC, a software called motion streams the current webcam image on a specified port. However, for my purpose of taking a photo every minute automatically, I didn't need a pseudo-live stream. If you don't need this feature, you can skip this part. Install motion:
$ apt-get install motionEnable motion to start with the system in /etc/default/motion:
start_motion_daemon = yesConfigure /etc/motion/motion.conf by setting the video source and resolution. To make the stream accessible from all computers, turn off webcam_localhost and control_localhost in the config. Access the stream at http://server:8081/?action=stream.
For modern webcams, you might adjust brightness settings in /etc/motion/motion.conf. However, this didn't work with my model.
A Convenient FFMpeg Alternative
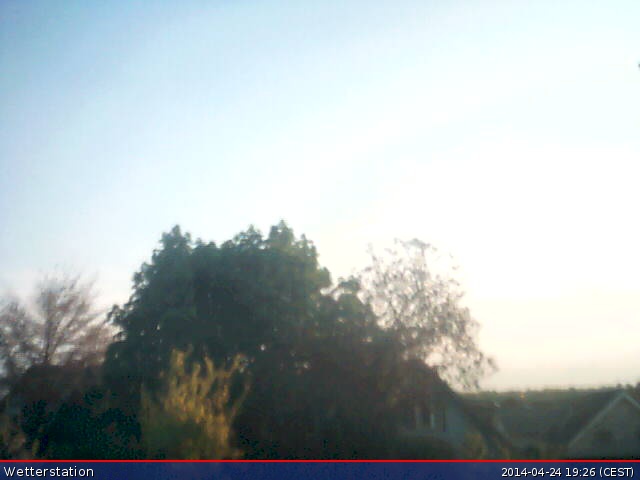
Fswebcam is a handy alternative that allows parameter adjustments. Install and use fswebcam with a configuration file (cam.conf) for more flexibility. Here's a sample cam.conf content:
device /dev/video1
jpeg 95
skip 20
resolution 640x480
title "Weather Station"
set "White Balance Temperature, Auto"=True
set "Contrast"=30
set "Saturation"=40
frames 1
This configures the device, resolution, and various imaging settings. The result is satisfactory, as seen in the image above.
Streaming the Webcam
For broader access, I transitioned from streaming to a script-based approach that captures an image every minute. The script includes a delay for brightness adjustment and uses fswebcam for flexibility. The final setup allows for remote access and integration with web services, ideal for indoor applications.
Photo with FFMpeg Including Text Overlay
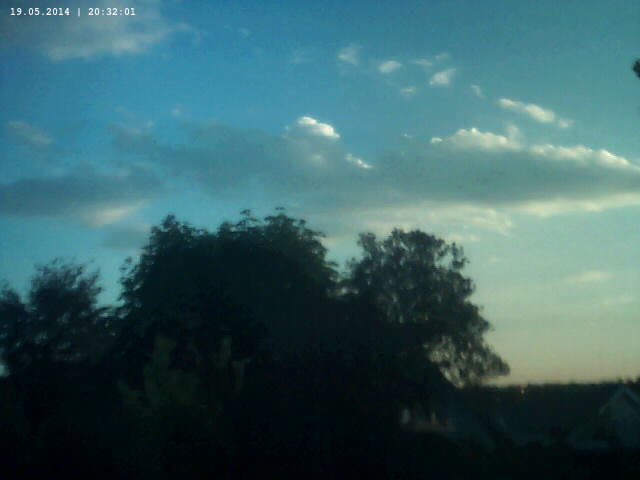
Earlier, I demonstrated capturing a photo with the webcam using ffmpeg (or avconv). However, I also wanted to include the date and time on the image. This process is a bit complex, but it provides a great opportunity to learn about ImageMagick, a powerful image manipulation tool. I won't delve deeply into its capabilities here – it's better to explore the ImageMagick manual and experiment yourself. The basic idea is to overlay a transparent PNG file, containing the date and time text, on top of the webcam image.
$ convert -size 640x480 xc:transparent -font Courier-bold -pointsize 10 -fill GhostWhite -draw "text 10,15 'April 20, 2014 | 19:45:00'" output.pngThis command creates a transparent 640x480px image with the text "April 20, 2014 | 19:45:00" in Courier Bold, 10pt, GhostWhite color, positioned at the top left corner. The file is named output.png. Font style and content can be adjusted, as well as the position and other parameters.
$ composite -dissolve 100% -quality 100 output.png image.jpg output.jpgThis command combines the webcam image (image.jpg) and our text overlay (output.png) into output.jpg. The result is the webcam image with overlaid text.
Helpful links:
Automating the Process
Cronjobs make life easier. This program will call our script every minute. The script's goal is to take a photo, add a text overlay, save and archive it.
webcam_photo.sh:
#!/bin/sh

FOLDER="/var/www/cam"
TIME=$(date +"%d.%m.%Y | %H:%M:%S")

# Save photo under FOLDER/tmp.jpg

avconv -f video4linux2 -s 640x480 -r 1 -i /dev/video-webcam -vframes 1 -f image2 $FOLDER/tmp.jpg
# Alternatively, use fswebcam -c /home/sven/webcam/cam.conf -D 2 $FOLDER/current.jpg

# Prepare date and time

convert -size 640x480 xc:transparent -font Courier-bold -pointsize 10 -fill GhostWhite -draw "text 10,15 '$TIME'"
$FOLDER/tmp.png

# Merge both as current.jpg

composite -dissolve 100% -quality 100 $FOLDER/tmp.png $FOLDER/tmp.jpg $FOLDER/current.jpg

# Archive file under FOLDER/YYYY/MM/DD/HH_MM.jpg

ARCHIVE=$(date +"/archive/%Y/%m/%d/")
FILE=$(date +"%H_%M.jpg")

# Create directory if it doesn't exist

mkdir -p $FOLDER$ARCHIVE

cp $FOLDER/current.jpg $FOLDER$ARCHIVE$FILE
The script is self-explanatory. The current image is found in the web folder under /cam/current.jpg. Additionally, there's an archive under /cam/archive/YEAR/MONTH/DAY/. All files are managed automatically, creating new folders for each year, month, and day. The base folder can be adjusted at the top variable. Make the script executable with chmod +x webcam_photo.sh.
Run the script:
$ ./webcam_photo.shSetting Up a Cronjob
Edit the /etc/crontab and add the following line at the bottom.
$ vim /etc/crontab
*/1 6-21 * * * root /home/sven/webcam/webcam_photo.sh > /dev/null 2>&1This line indicates that the script will be executed every minute, between 6:00 AM and 9:59 PM. The output is discarded. The ubuntuusers.de Wiki offers excellent examples for setting up cronjobs.
Optimizing the Webcam Image
I've described my method for image optimization. For me, two sunglasses lenses suffice, and the image is acceptable. Modern webcams, like the ones linked at the start of this article, offer automatic brightness control, making the process much easier and likely yielding better results. The v4l-utils tool may also help adjust settings like brightness if the webcam supports it.
Creating Time-Lapse Videos
Experimenting with ffmpeg (avconv) reveals that it's possible to create time-lapse videos. A single-line command takes all the images in a folder and compiles them into a time-lapse. Following my archiving script where images are saved as Hour_Minute.jpg, arranging the files alphabetically suffices for the software.
avconv -f image2 -pattern_type glob -i "*.jpg" -r 20 day.movThis command uses images in the current folder to create a video named day.mov. This process could be scripted to create a daily video at midnight, using absolute paths to the images and the date command as in my script above.
Conclusion
With some effort, it's possible to automate a webcam to take a photo every minute. This creates a personal archive, enables time-lapse video creation, and allows external services to access the latest image (cam/current.jpg). This setup has worked wonderfully with Weather Underground for some time. An old webcam thus finds a new purpose. Those who enjoy tinkering might disassemble the webcam to try adding a lens shade or other modifications for image optimization or darkening.
I hope this guide can help others. My webcam, along with the script, has been running smoothly for over a month, providing a lovely addition to my weather station's webpage and the joy of watching daily time-lapses.


Ein Kommentar
Kommentar hinzufügen
26. April 2022, 17:26 Uhr
ChefkonstuctorDas war sicher viel Arbeit, aber sehr informativ.
Vielen Dank dafür.